")
My bathroom was the color of a hospital waiting room.
Not metaphorically. The walls were actually this institutional beige that made the entire room feel depressing and small. The tile was original to the apartment (20+ years old). The mirror was this sad metal frame that looked like it was holding on for dear life. The lighting came from one harsh overhead light that made everything look worse.
I’d been renting for three years, just accepting the bathroom as is. Then a friend visited and said “why do you have the ugliest bathroom in the world?” and something clicked.
I couldn’t renovate. I couldn’t rip out tile. I couldn’t make permanent changes. But I could paint. I could add peel-and-stick tile as an accent. I could change the mirror. I could add better lighting. I could make something that looked intentional instead of sad.
I spent a Saturday afternoon doing this makeover and another Saturday doing small finishing touches. Total cost was $260. Total time was maybe 8 hours actual work. The result looks like a real bathroom instead of a bathroom that’s given up.
Here’s exactly how I did it.
The Problem Before: Why the Bathroom Felt Bad
The bathroom had:
- Institutional beige walls that made everything look sickly
- 20-year-old tile with grout so dark it looked dirty no matter what
- A sad metal-framed mirror that contributed nothing
- One harsh overhead light making everything look fluorescent
- No actual storage or organization
- The general vibe of “this is where bathrooms go to slowly die”
It wasn’t broken. It was just deeply uninspiring.
What I Wanted to Change (Realistic Budget Edition)
I wanted:
- Walls that didn’t make me feel sad
- Some visual interest beyond plain tile
- Better lighting that didn’t feel clinical
- A mirror that looked intentional
- The overall feeling of “I made a choice about this space” rather than “this space was assigned to me”
Budget constraint: $300 maximum.
Budget Breakdown
- Paint: $50 (gallon of good paint, primer, brush, roller)
- Peel-and-stick accent tile: $75 (10 sq feet)
- New mirror: $45 (simple frame, nice-looking)
- LED bathroom lighting: $55 (dimmable, warm)
- Hardware (vanity handles, towel rack, shelving): $40
- Baskets for organization: $25
- Miscellaneous (spackle, tape, etc): $15
Total: $305 (slightly over but close)
Step 1: Clean and Prep (2 hours)
This is the unsexy part that makes everything else work.
I cleaned the bathroom thoroughly. Removed everything from surfaces. Cleaned the walls to prepare for peel-and-stick tile. Wiped down the vanity. Removed old hardware.
The old mirror came down. The old towel rack came down. The old light fixture… stayed up because removing it requires turning off the power and I wasn’t feeling confident about that.
I knew where the peel-and-stick tile was going — a feature wall behind the vanity. I measured and marked it precisely so the tiles would be straight and centered.
What I would do differently: I’d have done more prep of the vanity surface before applying peel-and-stick tile. Some tiles went on slightly uneven because the surface wasn’t as smooth as it could have been.
Step 2: Paint the Walls (3 hours, actual painting time)
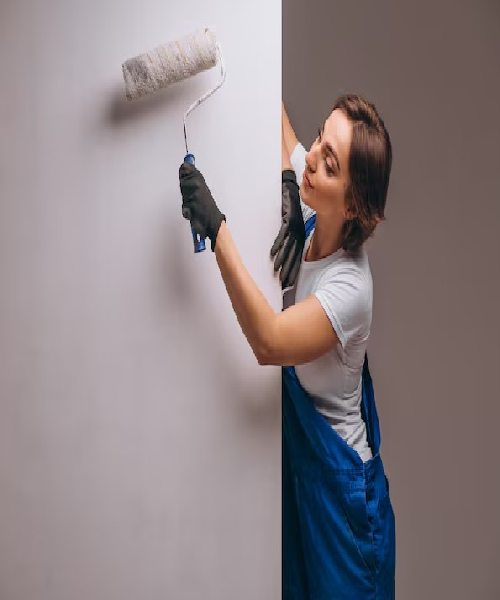
I chose a soft gray-green color (something like Sherwin Williams Sea Salt but cheaper) because it’s calm, doesn’t feel clinical, and makes the bathroom feel bigger.
I primer-ed first. One coat of primer. Then one coat of paint. That was it.
The institutional beige disappeared. The room felt different immediately. Not fancy, just intentional.
I painted the ceiling white to reflect light and keep the space feeling open. I left the original tile as-is because I didn’t want to paint tile.
What I would do differently: I’d have used a slightly better quality paint. The cheap paint needed two coats to cover evenly. Better paint would have been one coat.
Step 3: The Peel-and-Stick Tile (1.5 hours)
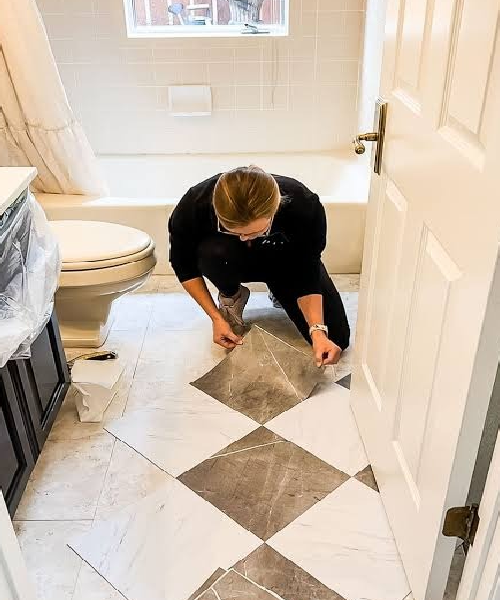
This is the feature that changes the entire vibe.
I bought peel-and-stick vinyl tiles in a simple geometric pattern (white with subtle gray geometric). Applied them in a 3-foot-wide x 3-foot-high section behind the vanity.
Installation:
Measured and marked the area with a level
Applied tiles one at a time, pressing firmly and smoothing out bubbles
Used a squeegee to get all the bubbles out
The mistake I made: I went too fast and got a bubble in one corner. Tried to fix it after the fact, made it worse. Next time I’ll go slower and use the squeegee more aggressively upfront.
The tiles look like tile. They’re peel-and-stick so they’re not permanent (which is perfect for renting) but they look intentional. The geometric pattern adds visual interest without being overwhelming.
Step 4: Mirror, Hardware, and Lighting Changes (2 hours)
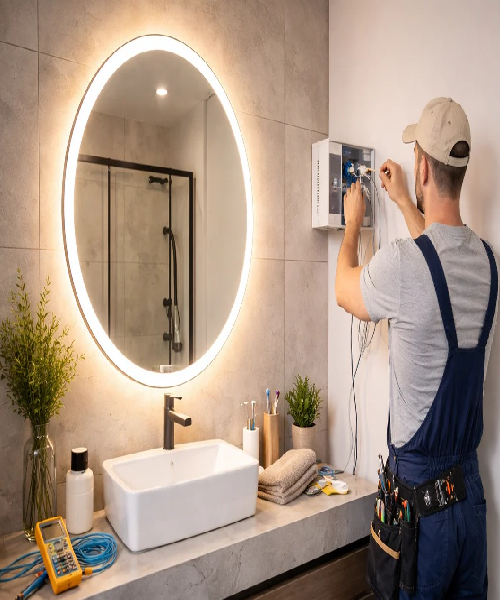
I took down the old mirror and installed a new one with a simple black frame. Measured and hung it centered on the wall.
I changed the vanity handles from old cheap plastic to simple modern hardware. This sounds minor but changed the entire feel of the vanity.
For lighting, I removed the old ceiling fixture’s bulb and replaced it with a dimmable LED bulb in warm white (2700K). The same fixture, better bulb, completely different feel.
I also added a small LED strip under the mirror (adhesive, no installation) for task lighting. Makes a difference for actual tasks like brushing teeth.
What I would do differently: I’d have invested in an actual new light fixture instead of just changing the bulb. The fixture itself is still old and showing. A $40 new fixture would have completed the look.
Step 5: Storage and Small Touches (1 hour)
I added small woven baskets under the vanity to organize supplies. Added a simple wooden shelf above the toilet (adhesive strips, no drilling) for decoration and function.
Added new towels in colors that matched the new walls. Added a small plant. Basic styling that made the space feel complete.
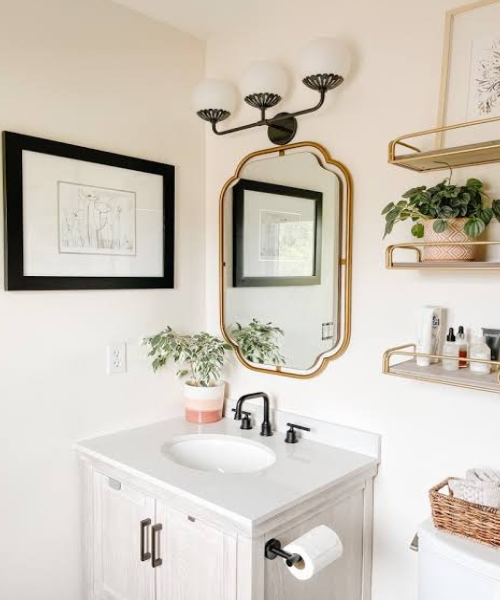
Before vs After
Before: Beige walls, old tile, sad mirror, fluorescent lighting, chaos on surfaces.
After: Soft gray-green walls, geometric peel-and-stick accent tile, simple black-framed mirror, warm LED lighting, organized storage, intentional styling.
It’s genuinely a different space. Same fixtures, same footprint, completely different feeling.
Products Used (Affiliate-Ready List)
- Paint: Sherwin Williams Sea Salt (or equivalent gray-green)
- Primer: Basic white primer, 1 gallon
- Peel-and-stick tile: Vinyl adhesive floor tiles, geometric pattern, 10 sq ft
- Mirror: Simple black frame, 24×30 inches
- LED bulb: Dimmable warm white (2700K), A19 size
- LED strip: Under-mirror task lighting, adhesive
- Vanity handles: Modern chrome or matte finish, 2-3 inch
- Towel rack: Simple black metal, wall-mounted
- Shelf: Wood or metal, 24-36 inches, adhesive strips
- Baskets: Woven storage, sizes 8-12 inches
- Hardware: Various small fixes and updates
What I Would Do Differently (Honest Assessment)
The paint application: I’d buy better paint and expect one coat instead of assuming I needed two. The cheap paint required more effort.
The peel-and-stick tile bubble: I’d go slower and use the squeegee more deliberately. The bubble in the corner annoys me and it’s my mistake for rushing.
The light fixture: I’d have replaced the entire fixture instead of just the bulb. The old fixture is still there and still looks old.
Vanity organization: I’d have planned the under-vanity storage better before buying baskets. Some baskets are too large for the space.
The grout: I didn’t address the original tile grout which is dark and still visible. A grout pen could have helped, but that’s a whole other project.
FAQs
How long does peel-and-stick tile actually last?
If applied correctly and not in high-moisture areas, 5-7 years easily. In a bathroom where it’s getting splashed, maybe 3-5 years. It’s designed to come off, so it’s not permanent anyway.
Can I paint over peel-and-stick tile?
You can, but you’re committing to it being permanent. If you’re renting, avoid painting over it.
What if I mess up the peel-and-stick application?
Carefully peel it off and try again. If you’re gentle, it removes cleanly. If the back loses stickiness, you bought removable tape strips to help.
Can I use these same steps in a larger bathroom?
Yes, just more of everything. The steps are the same, scale is different.
Is a DIY bathroom truly better looking than a professional one?
No. But it looks intentional and thoughtful instead of neglected, which is most of what matters.
Final Result
My bathroom went from “this makes me sad” to “I like this space.” It’s not a luxury bathroom. It’s not expensive. It’s just intentional.
The best part is that every change is reversible. The paint can be painted over. The peel-and-stick can be removed. The hardware can be swapped back. For a renter, that’s everything.
I spent $260 and a Saturday, and I got a bathroom I actually enjoy being in instead of one I avoid.
That’s the whole story.